
The XML sitemap feature
Follow these steps to enable the XML sitemaps feature:
- Log in to your WordPress website.When you’re logged in, you will be in your ‘Dashboard’.
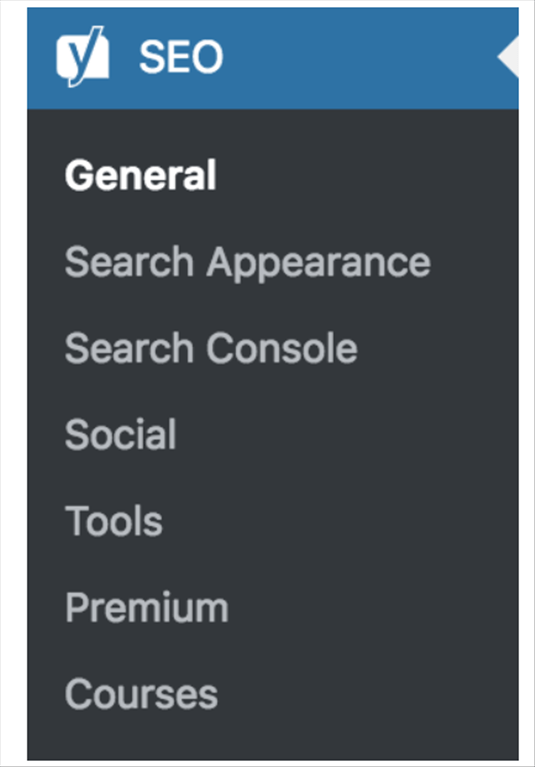
- Click on ‘SEO’On the left-hand side, you will see a menu. In that menu, click on ‘SEO’
- Click on ‘General’.The ‘SEO’ settings will expand providing you additional options. Click on ‘General’.
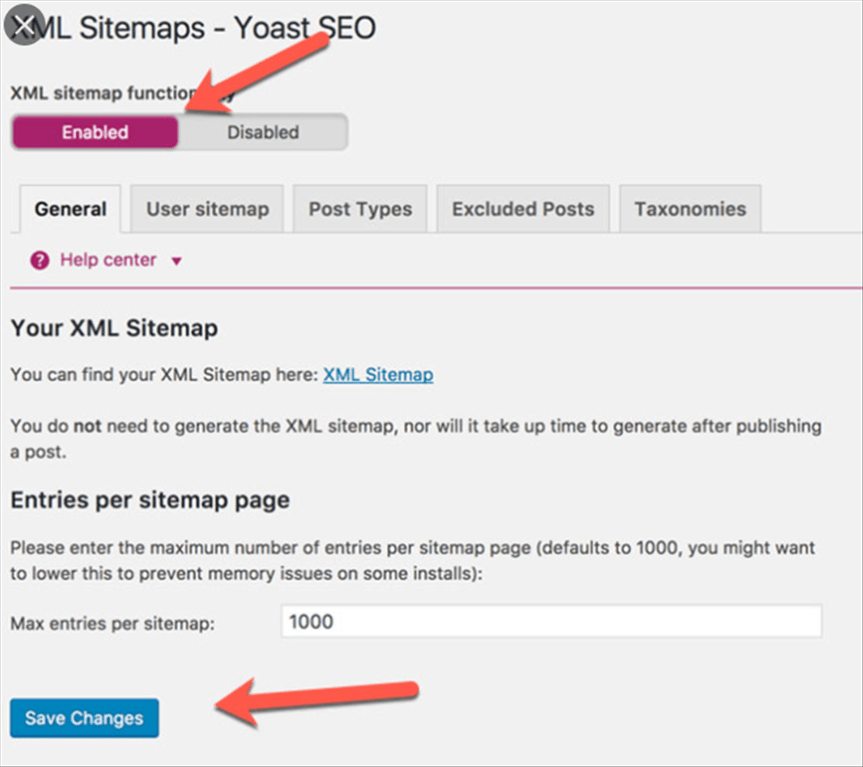
- Click on the ‘Features’ tab.

- Toggle the ‘XML Sitemaps’ switch.To enable the feature, toggle the switch to ‘On’.
To disable the feature, toggle the switch to ‘Off’. - Click ‘Save Changes’
View the sitemap
- Log in to your WordPress website.
When you’re logged in, you will be in your ‘Dashboard’. - Click on ‘SEO’.
On the left-hand side, you will see a menu. In that menu, click on ‘SEO’ - Then, click on ‘General’.
Clicking on General will open the General – Yoast SEO settings. - In the Yoast SEO General settings, click on the ‘Features’ tab.
- Click the question mark for the XML Sitemap feature.
- Then, click ‘See the XML sitemap.’
Limit the number of sitemap entries
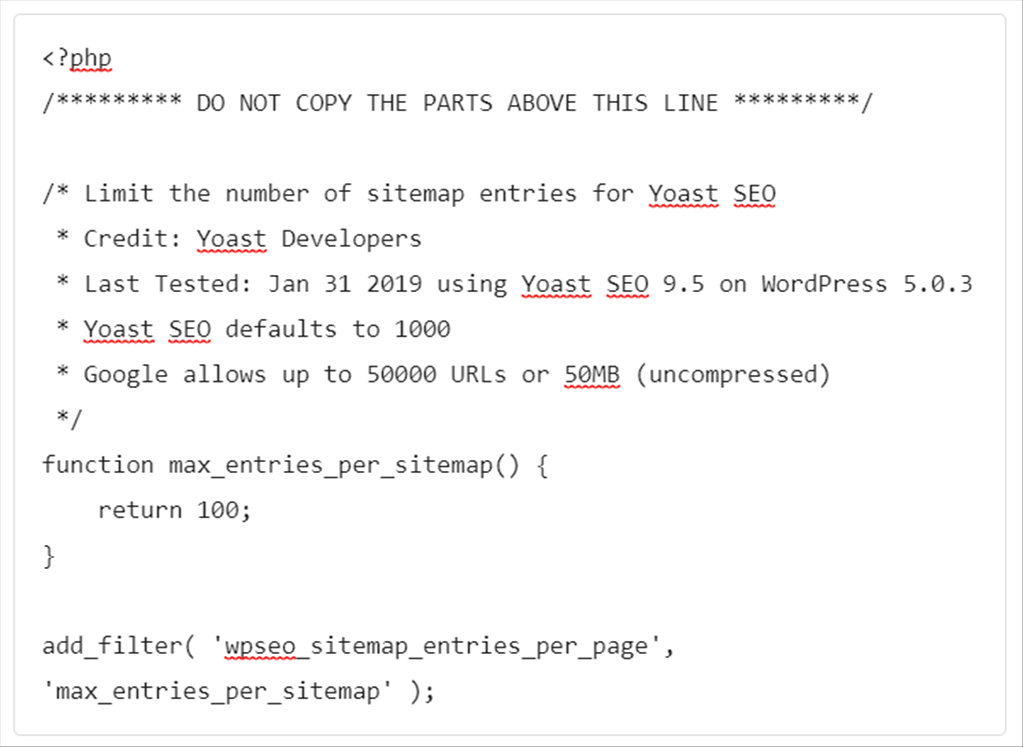
You can limit the number of sitemap entries by using the filter wpseo_sitemap_entries_per_page. Here follows example code to limit the max entries to 100. If you are not sure where it would go or how to add this code, we suggest working with a Yoast Partner here who can help.
Latest posts by GCS Team (see all)
- Fix “Sorry, This File Type Is Not Permitted for Security Reasons” Error in WordPress - August 25, 2020
- My HP OMEN is showing a “plugged in, not charging” when I plug it in to charge. - August 25, 2020
- Access another computer with Chrome Remote Desktop - August 22, 2020