First thing you need to do is install and activate the User Submitted Posts plugin.
Upon activation, you need to visit Settings » User Submitted Posts to configure the plugin.
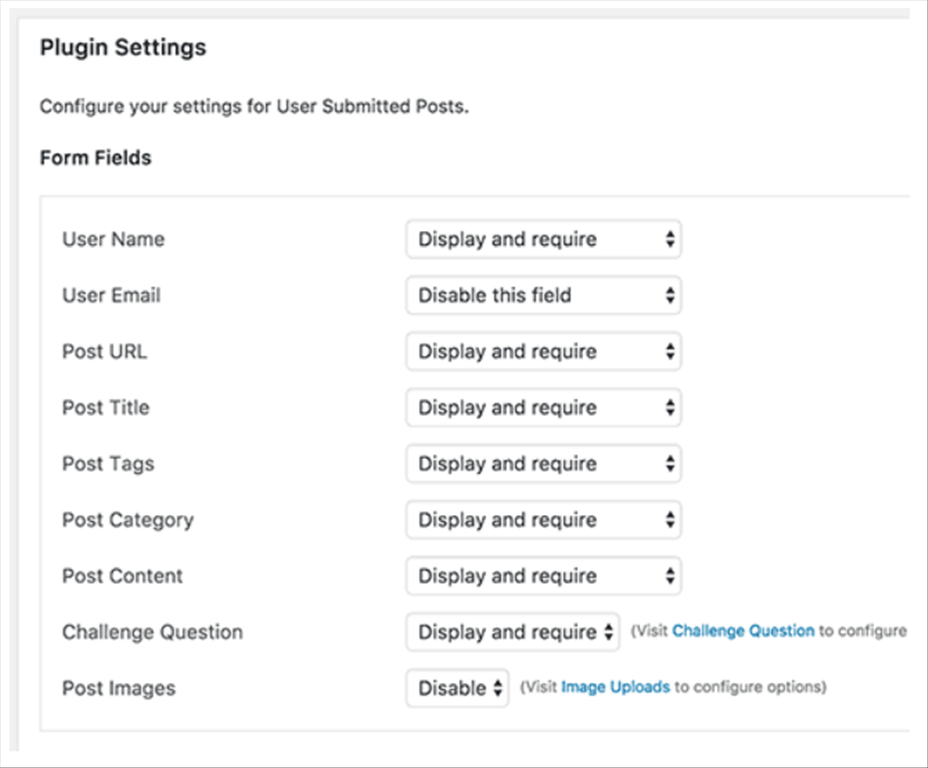
Under plugin settings, you can select the fields you want to display on the post submission form and hide any field that you don’t want users to see.
You can choose a default author for all user submitted content. We would recommend that you create a new Guest User on your WordPress site and assign all user submitted posts to that user.
You can also allow users to upload images and set a limit on number of images and maximum image size. You can even set a user uploaded image as the featured image.
After reviewing all plugin settings, click on the Save Changes button to store your settings.
You are now ready to add the user submitted posts form to your website.
Create a new page in WordPress or edit an existing page where you would like to show the form. In the post editor simply add this shortcode
[user-submitted-posts]
You can now save or publish your page. Visit the page to see your user submitted posts form in action.
- Fix “Sorry, This File Type Is Not Permitted for Security Reasons” Error in WordPress - August 25, 2020
- My HP OMEN is showing a “plugged in, not charging” when I plug it in to charge. - August 25, 2020
- Access another computer with Chrome Remote Desktop - August 22, 2020


